


Last Updated: November 2, 2026
Quick Summary
To fix a leaking shut off valve, first dry the area and wrap a paper towel around the valve body and connection nut to find the exact leak point. Then turn off the water supply, tighten or replace the packing, washer, or valve as the wet spot indicates.
- Wrap a dry paper towel around the valve body and supply nut, then check where it gets wet.
- Turn the hot and cold shut-off valves clockwise until fully closed before touching anything.
- Professional leaky-faucet repairs typically run between $100 and $400 depending on faucet type.
- Tighten the packing nut a quarter turn; replace the packing if it still drips.
- Replace the valve if the body is cracked, corroded, or the stem is pitted.
Table of Contents
- Find Where the Shut-Off Valve Is Leaking
- Turn Off the Water Supply and Prepare Your Tools
- How to Fix a Leaking 1/4 Turn Valve
- Stop a Shut Off Valve Leaking at the Threads
- Why a Water Shut Off Valve Leaks When Open
- When to Replace the Valve Instead of Repairing It
- Pick Your Next Step for a Dry Kitchen Sink
- Frequently Asked Questions
A leaking shut-off valve under your kitchen sink is easy to ignore until the cabinet floor starts to feel soft. At Jackie's Attic, we've learned that the fix starts with figuring out exactly where the water is escaping. Repairs are cheap when you find the leak early. Professional leaky-faucet repairs typically run between $100 and $400, according to Angi's plumber cost guide for fixing leaky faucets, depending on the faucet type and the part that needs replacing.
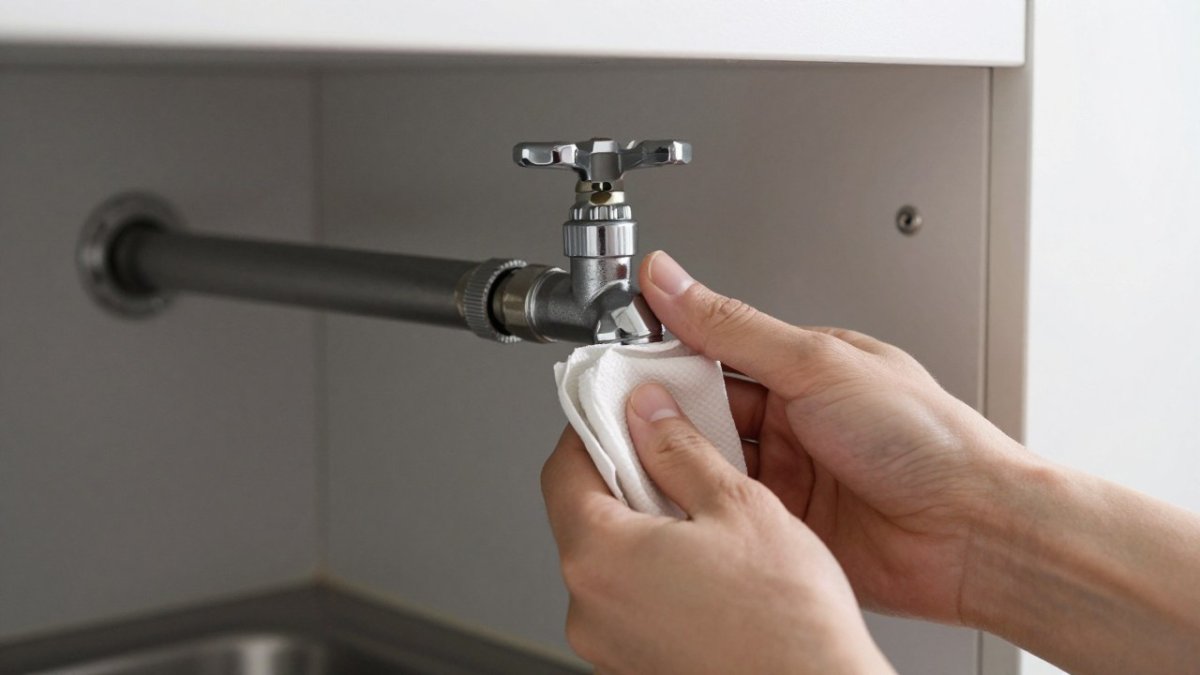
Start with a dry paper towel. Wrap it around the valve body and the nut where the supply line connects. Leave it for a few minutes, then check.
Find Where the Shut-Off Valve Is Leaking
Start with a dry paper towel. Wrap it around the valve body and the nut where the supply line connects. Leave it for a few minutes, then check. Where the paper towel is wet tells you which repair you need. Under-sink shut-off valves can leak at several spots, and each one may need a different fix.
Leak at the Handle or Stem
Water that seeps around the handle usually means worn packing inside the valve stem. Look for:
- Moisture around the base of the handle
- Water beading on the valve stem
- Stiffness when you turn the handle
A stiff handle often points to mineral buildup. Scale can also restrict water flow over time. If the drip appears only when you turn the handle, the packing nut is the likely culprit, see the packing-nut step below.
Leak at the Packing Nut
The packing nut is the small hex nut just under the handle. A drip that runs down the stem and pools on top of the valve body usually means the packing has compressed or dried out. Tighten the packing nut a quarter turn with an adjustable wrench and recheck. If the drip slows but doesn't stop, the packing needs replacing rather than more tightening.
Leak at the Compression Nut or Supply-Line Connection
If the drip comes from where the pipes join the valve, check the compression nut and the supply line. Dampness on the threads or a wet ring around the nut usually means the connection needs tightening or a new washer. A leak that appears only when the faucet is running often points to the supply-line connection rather than the valve internals.
Leak at the Valve Body or Seats
A crack or pinhole in the valve body itself shows up as a constant weep that no amount of tightening fixes. Wipe the body dry and watch for water reappearing on the casting rather than at a joint. Corrosion around the body, green or white crust on the brass, or a hairline crack means the valve should be replaced, not repaired.
Tell a Faucet Leak From a Valve Leak
Before you buy parts, confirm the water is coming from the valve and not the faucet above it. Dry the entire area, then run the faucet and watch. Water that tracks down the supply line from the faucet base is a faucet problem. Water that appears at the valve with the faucet off is a valve problem. This one check keeps you from rebuilding a valve that was never leaking.
The paper-towel check points to the repair you need, so match the wet spot to the fix in this table.
| Where the leak shows | Likely cause | Fix |
|---|---|---|
| Around the handle or stem | Worn packing inside the valve stem | Tighten packing nut or replace packing |
| Under the packing nut | Compressed or dried-out packing | Tighten a quarter turn; replace if it still drips |
| At the compression nut or supply line | Loose connection or worn washer | Tighten or replace the washer |
| On the valve body or seats | Crack, pinhole or corrosion | Replace the valve |
| Only when the faucet runs | Supply-line connection, not valve internals | Check and tighten the supply-line connection |
Turn Off the Water Supply and Prepare Your Tools
Before you touch anything, shut off the water. Locate the hot and cold shut-off valves under the sink. Turn them clockwise until fully closed. Kohler's guide to fixing a leaky sink faucet recommends this first step for any faucet repair.
Open the faucet after closing the valves. Any water left in the lines will drain out, which keeps your cabinet dry.
If the Leak Is Getting Worse
If water is spraying or the cabinet is filling faster than a towel can handle, stop and go to the main shut-off. In most homes the main valve is where the water line enters the house, often in a basement, utility closet, or at the meter. Close it fully, then open a low faucet elsewhere to drain the lines. If water has reached an outlet, a disposal cord, or a dishwasher connection under the sink, cut power to that circuit at the breaker panel before you reach into the cabinet. Water and live electricity in the same cabinet is the one situation where you call a plumber instead of continuing.
Protect the Cabinet and Your Workspace
Under-sink cabinets are cramped, and a slip with a wrench can crack a valve body or scar the cabinet floor. Clear out stored items and cleaning products first. Lay old towels on the cabinet floor and set a shallow pan or bucket directly under the valve. A small mirror and a flashlight help you see the back of the valve where the supply line connects. If the cabinet floor is already soft or swollen from a long-running leak, note it, that damage points to a leak that has been active for weeks, not hours.
Know Your Valve Type Before You Buy Parts
Look at how the valve connects before you shop. Compression fittings have a nut that compresses a brass ring (ferrule) onto the pipe and are common on copper supply lines. Threaded connections screw onto a fitting and use plumber's tape. Push-fit and quarter-turn valves use cartridges or O-rings rather than packing. The repair you choose has to match the valve: packing-nut tightening works on a traditional stem valve, while a quarter-turn ceramic valve needs a cartridge. Buying the wrong kit is the most common reason a weekend repair turns into a second trip to the store.
Gather These Tools
- Adjustable wrench
- Two wrenches, so you don't stress the pipe
- Screwdriver for the handle screw
- Replacement stem packing, cartridge, or a repair kit matched to your valve type
- Plumber's tape for threaded connections
- Old towels, a bucket, and a flashlight
Watch out: tightening a compression nut without holding the valve body with a second wrench can twist the supply pipe and start a new leak behind the cabinet wall.
How to Fix a Leaking 1/4 Turn Valve
A 1/4 turn valve uses a ceramic disc instead of a rubber washer. Its seals can wear out over time.
- Remove the handle screw and lift off the handle.
- Inspect the cartridge for cracks or mineral deposits.
- Clean the disc and seats with white vinegar.
- Replace the cartridge if you see damage.
Stop a Shut Off Valve Leaking at the Threads
Thread leaks usually come from loose or worn fittings. Use two wrenches so you don't twist the pipe. Hold the valve body with one wrench and tighten the nut with the other. Give it a quarter turn at a time.
If tightening doesn't stop the drip, wrap the threads with new plumber's tape before reconnecting. Don't over-tighten. Too much force can crack the nut or the valve body.
For more help with faucet parts, see our guide on replacing a kitchen faucet aerator.
Why a Water Shut Off Valve Leaks When Open
A valve that leaks only when open usually has worn internal seals. As the handle turns, the packing or washer rubs against a damaged surface. Corrosion and mineral buildup make this worse.
Check the valve stem for pitting. If the stem is rough, a new packing washer may not seal well. In that case, the valve needs more than a quick fix.
If the faucet also splashes when you run it, our guide to fixing splashing kitchen faucets covers the flow-related causes.
When to Replace the Valve Instead of Repairing It
Replace the valve when:
- The body is cracked or corroded
- The stem is pitted and won't seal
- The handle won't turn smoothly after cleaning
- The valve is more than about 10 years old and parts are hard to find
According to EPA WaterSense guidance on finding hidden leaks, checking your water meter before and after a two-hour period of non-use can reveal whether a leak is still active in your system.
Pick Your Next Step for a Dry Kitchen Sink
Once the valve stops dripping, run the faucet for a few minutes and check the cabinet floor. Look again in a day. A slow leak can hide for a while.
If the drip returns, shut the valve and recheck the connections. If the faucet is also splashing, our guide to stopping kitchen faucet splashing walks through the next fixes.
Frequently Asked Questions
How do you get a shut-off valve to stop leaking?
Start by identifying the leak point. If water seeps from around the handle or stem, tightening the packing nut or replacing the stem packing usually stops it. If water drips from the threads where the valve meets the supply line, you may need to tighten the connection with two wrenches or replace a worn compression nut or gasket. Always shut off the main water supply first, and keep a towel and bucket under the valve while you work. If tightening makes the leak worse or the valve body is cracked, replace the valve rather than forcing it.
How much does it cost to have a plumber replace a shut-off valve?
Actual pricing depends on the valve type, the accessibility of the valve, and whether the supply line also needs replacing. For a quote specific to your project, contact a licensed local plumber.
Why is my kitchen sink shut-off valve leaking when it is open?
A valve that leaks only when open usually has worn packing around the stem. Each time the handle turns, the stem moves through this packing, so a worn seal lets water escape. Tightening the packing nut slightly often solves the problem. If the stem is pitted or corroded, rebuilding the valve with a stem repair kit is often more effective than repeated tightening.
Can you fix a leaking 1/4-turn shut-off valve?
Yes, in many cases. Quarter-turn valves have a ball or disc that rotates to open and close the water flow, and their seals can wear out over time. Turn off the water, remove the handle, and inspect the stem and seals for corrosion or mineral buildup. Replacing the internal cartridge or seal kit can stop the leak. If the valve body itself is cracked or corroded through, replace the whole valve.
Jackie's Attic carries practical home accessories that make everyday repairs and upkeep simpler. Browse our collection to find the tools that fit your kitchen.


