


Table of Contents
- Why Your Kitchen Faucet Is Splashing
- What You'll Need Before You Start
- How to Clean a Kitchen Faucet Aerator to Reduce Faucet Splashing
- Adjusting Water Pressure at the Shut-Off Valve
- Faucet Height, Spout Reach, and Sink Depth Compatibility
- Using a Kitchen Sink Splash Guard
- Common Mistakes to Avoid When Fixing Faucet Splashing
- Conclusion
Last Updated: August 22, 2026
Why Your Kitchen Faucet Is Splashing
Faucet splashing is frustrating and common. We hear this complaint constantly from homeowners who assumed they needed a new faucet, only to discover the real fix costs nothing and takes ten minutes.
The core issue is almost never the faucet itself. It's a combination of water pressure, stream quality, and the physical relationship between your spout and your sink basin. Understanding that distinction is what separates a permanent fix from a temporary workaround.
According to WaterSense program guidelines, standard kitchen faucets should flow at no more than 2.2 gallons per minute (gpm) at 60 psi. When pressure climbs above that threshold, or when the stream becomes turbulent rather than smooth, splashing is the inevitable result.
The Physics Behind Turbulent Water Streams
A laminar flow is a smooth, coherent water stream where all water molecules move in parallel lines. A turbulent flow is chaotic, fast-moving water that breaks apart as it exits the nozzle, creating spray that soaks your hands and countertop.
Most faucet splashing happens because the aerator screen is partially clogged with mineral buildup, which disrupts laminar flow. A clean aerator introduces tiny air bubbles into the stream, stabilizing it. Remove that stability, and the angle at which the water stream hits the sink basin becomes much more likely to produce a splash rather than a clean drain.
The fix, in most cases, starts with the aerator. But there are six other factors worth checking, and we'll walk through all of them below.
What You'll Need Before You Start
Most of these fixes require nothing more than basic hand tools and household supplies. Gather these before you start:
- Adjustable wrench or needle-nose pliers (wrapped in tape to protect chrome finish)
- White vinegar
- Small bowl or cup
- Soft toothbrush or old cleaning brush
- Replacement aerator (optional, under $10 at any hardware store)
- Laminar flow insert (optional, check your faucet's thread size first)
- Teflon tape (for reinstalling threaded components)
- Flashlight (for inspecting shut-off valves under the sink)
Before you touch anything: turn off the water supply at the shut-off valve under the sink before removing any faucet components. It takes 30 seconds and prevents a mess.
How to Clean a Kitchen Faucet Aerator to Reduce Faucet Splashing
Cleaning the aerator is the single most effective fix for faucet splashing. The aerator is the small threaded device screwed onto the tip of your spout. It contains a mesh screen that filters sediment and introduces air into the stream, but that same screen collects mineral buildup over time, which clogs the nozzle and destroys the stream pattern.
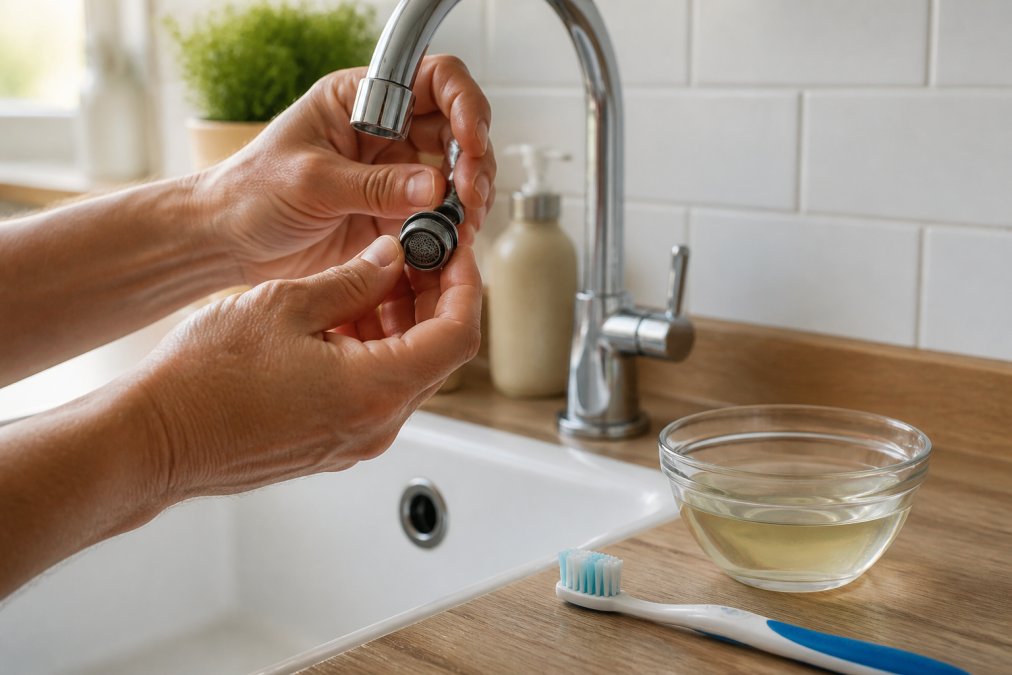
How to clean your kitchen faucet aerator:
- Wrap your pliers with masking tape to avoid scratching the chrome finish.
- Grip the aerator and turn counterclockwise to remove it. Many aerators unscrew by hand.
- Disassemble the aerator carefully, noting the order of components (housing, washer, mesh screen, flow restrictor disk).
- Soak all parts in white vinegar for 30 minutes to dissolve mineral buildup.
- Scrub the mesh screen gently with a soft toothbrush to remove loosened sediment.
- Rinse thoroughly under running water and reassemble in the same order.
- Reinstall the aerator, turn the water back on, and check the stream pattern.
A clean aerator should produce a steady, aerated stream with no visible spray or misting at the edges.
Removing Mineral Buildup and Sediment from the Screen
Hard water is the main culprit behind a clogged screen. Calcium and magnesium deposits accumulate on the mesh and restrict flow volume unevenly, creating the chaotic spray pattern that causes splashing.
If the vinegar soak doesn't fully clear the screen after one round, repeat the process or replace the aerator entirely. Replacement aerators are inexpensive and widely available in standard thread sizes (most kitchen faucets use 15/16-inch male or 55/64-inch female threads; check your existing unit before buying).
Installing a Laminar Flow Insert Instead
A laminar flow insert replaces the standard aerator with a device specifically engineered to produce a glass-clear, non-splashing stream. Instead of introducing air bubbles, a laminar flow insert uses a stream straightener, a grid of tiny parallel channels that align water molecules into a coherent flow.
This is the professional-grade fix, common in commercial kitchens and medical facilities where splash control is critical. Laminar flow inserts install exactly like a standard aerator and produce a visually distinct stream: smooth, transparent, and nearly silent. If you've cleaned your aerator and still have splashing problems, a laminar flow insert is the next logical upgrade.
Adjusting Water Pressure at the Shut-Off Valve
High water pressure is the second most common cause of faucet splashing. When incoming water velocity is too high, even a clean aerator can't fully tame the stream. The fix is to reduce flow at the source.
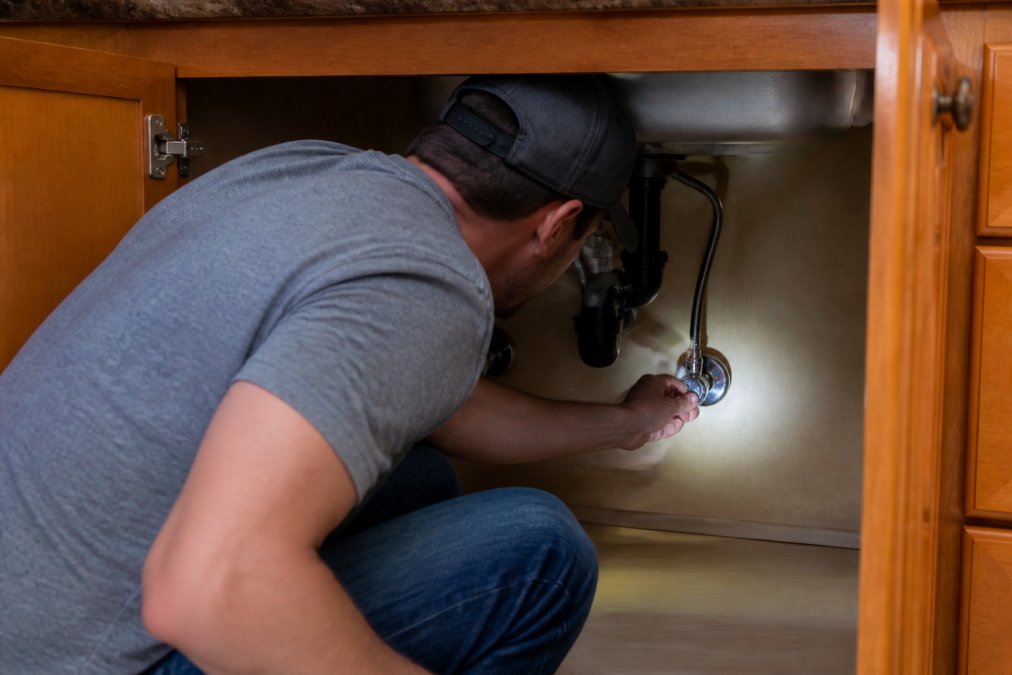
The shut-off valve under your kitchen sink controls water flow to the faucet independently of the rest of your plumbing. Most homeowners never touch it after installation, but it's the fastest way to reduce flow rate without any tools or replacement parts.
To reduce pressure at the shut-off valve:
- Open the cabinet under your sink and locate the hot and cold shut-off valves (typically chrome or brass, with a handle or oval knob).
- Turn each valve clockwise by a quarter turn to reduce flow.
- Test the faucet. If splashing decreases, you've found your fix.
- Fine-tune by making smaller adjustments until the stream is steady without feeling weak.
According to American Society of Plumbing Engineers technical resources, residential water pressure between 40 and 60 psi is considered optimal for fixture performance. If your home's overall pressure runs higher than that, a pressure-reducing valve (PRV) installed on the main supply line is the permanent solution, a job for a licensed plumber.
How to Install a DIY Flow Restrictor
A flow restrictor is a small plastic disk with a calibrated opening that limits the volume of water passing through your faucet. Most modern faucets include one already, but it can be removed or worn out over time.
To install a replacement flow restrictor:
- Remove the aerator as described above.
- Look inside the faucet spout for an existing restrictor disk, usually a flat, colored plastic piece with a small hole in the center.
- If it's missing or damaged, purchase a replacement that matches your faucet's gpm rating (1.5 gpm or 1.8 gpm are common kitchen ratings).
- Press the new restrictor into the aerator housing before reassembling.
- Reinstall the aerator and test.
Flow restrictors also support water conservation. Faucets that meet the 1.5 gpm standard use significantly less water than older fixtures without meaningful performance trade-offs.
Faucet Height, Spout Reach, and Sink Depth Compatibility
Even a perfectly functioning faucet with a clean aerator will splash if the physical geometry is wrong. Faucet height, spout reach, and sink depth all interact to determine where and how the water stream hits the basin.
| Factor | Ideal Specification | Splash Risk if Wrong |
|---|---|---|
| Faucet height | 8-10 inches above sink rim | Too tall: high velocity at impact |
| Spout reach | Stream lands 2-3 inches from drain | Too short: hits basin wall |
| Sink depth | 8-10 inches for standard faucets | Too shallow: water exits basin |
| Angle of stream | Directed toward drain, not basin wall | Off-angle: lateral splash |
A tall faucet over a shallow sink is one of the most common compatibility mismatches in residential kitchens. The water stream accelerates over a longer drop, hits the basin with more force, and splashes outward. If your faucet was installed without accounting for your sink's depth, no amount of aerator cleaning will fully solve the problem.
Angle of Incidence: Getting the Stream Direction Right
The angle of incidence is the angle at which the water stream meets the sink surface. A stream hitting the basin at a steep angle (close to vertical) creates less splash than one hitting at a shallow angle. A perpendicular impact disperses energy downward, while an oblique impact deflects water outward.
Most faucets have a fixed spout angle, but some allow minor adjustments. Check whether your spout can be rotated or tilted to direct the stream more toward the drain. Even a small correction in stream direction can make a noticeable difference in how much water escapes the basin.
Deep Sink vs. Shallow Sink: What Changes
A deep sink (10 inches or more) contains splash naturally. The basin walls act as a splash guard, and the longer drop from spout to basin surface is offset by the containment geometry. Shallow sinks (under 7 inches) are much more vulnerable to splash because the water stream hits the basin closer to the rim.
If you have a shallow sink and a tall faucet, reduce the effective flow rate significantly using the shut-off valve or a low-gpm flow restrictor. A faucet extender that redirects the stream downward at a steeper angle can also help, the same principle behind the 1080° rotatable faucet extender that Jackie's Attic offers, which lets you reposition the stream direction without replacing the whole fixture.
Using a Kitchen Sink Splash Guard
A kitchen sink splash guard is a physical barrier, typically silicone or rubber, that attaches to the edge of the sink basin to contain water that would otherwise escape. It's the fastest fix when the root cause is geometry rather than water pressure or aerator condition.
Splash guards work best when the sink is too shallow to contain normal splashing, or when the faucet position makes it impossible to direct the stream toward the drain without hitting a basin wall. They're not a substitute for fixing the underlying pressure or aerator issue, but they're a practical stopgap.
Most splash guards clip or suction-cup onto the sink rim and can be removed for cleaning. Look for models made from food-safe silicone that won't trap bacteria or degrade from repeated water exposure. According to NSF International certification standards for kitchen products, food-contact materials in kitchen accessories should meet NSF/ANSI 51 standards for safety.
Common Mistakes to Avoid When Fixing Faucet Splashing
Most people who try to fix faucet splashing make the same handful of errors. Here's what to skip:
Replacing the entire faucet first. This is the most expensive mistake. The vast majority of splashing problems are solved by cleaning the aerator or adjusting the shut-off valve. A new faucet won't fix a pressure problem or a shallow-sink geometry mismatch.
Removing the flow restrictor to boost pressure. This makes splashing worse, not better. Higher flow rate means more water hitting the basin with more force.
Skipping the aerator disassembly. Running the faucet through the aerator without disassembling it doesn't clean the screen. You need to physically remove and soak the mesh to clear mineral buildup.
Ignoring the water hammer effect. If you hear a banging noise when you shut off the faucet quickly, you have water hammer, a pressure spike caused by fast valve closure. This indicates your supply pressure is running high, which contributes to splashing. A water hammer arrestor, installed on the supply line, addresses the pressure spikes.
Using the wrong aerator thread size. Aerators come in several standard sizes. Installing the wrong size creates leaks and may not seat the flow restrictor correctly. Always match the thread size to your existing aerator before purchasing a replacement.
Not checking spout reach after fixing pressure. Reducing water pressure sometimes reveals that the spout reach was always slightly off; the high velocity was masking it by blowing the stream past the problem zone. After any pressure adjustment, re-evaluate where the stream lands in the basin.
The good news is that faucet splashing is a genuinely solvable problem in almost every case. Work through the fixes in order: aerator first, then pressure, then geometry. Most people solve it at step one.
Frequently Asked Questions
Q: Why does my kitchen faucet splash so much?
A: Faucet splashing usually comes down to three causes: a clogged or missing aerator that disrupts the water stream, water pressure that is too high, or a mismatch between the faucet height and sink depth. When the stream hits the sink basin with too much velocity or at a wide angle, it breaks apart and sprays outward. Fixing the aerator or reducing pressure at the shut-off valve resolves most cases without any major plumbing work.
Q: Does an aerator stop faucet splashing?
A: Yes, in most cases. A clean, functioning aerator mixes air into the water stream and breaks the flow into smaller, consistent threads, which reduces turbulence on impact. A clogged screen packed with mineral buildup or sediment disrupts this pattern and causes the stream to spray erratically. Cleaning or replacing the aerator is the first fix to try for faucet splashing, and it costs almost nothing.
Q: Are there accessories to prevent sink splashing?
A: Several accessories help. A kitchen sink splash guard sits along the edge of the basin and catches sideways spray before it reaches your counter. Laminar flow inserts replace standard aerators and produce a clear, glass-like stream with very low splash. A faucet extender, like a 360-degree rotatable model, lets you redirect the spout toward the center of the basin, which is one of the most effective ways to control where the stream lands.
Q: Can a deep sink cause more splashing?
A: A deep sink actually reduces splashing compared to a shallow one, because the basin walls contain the spray and the water has more room to slow down before hitting the drain. Shallow sinks are more prone to splash because the water hits the bottom at a steeper angle with less depth to absorb the impact. If you have a shallow sink, lowering water pressure and angling the spout toward the drain center makes the biggest difference.
Fixing faucet splashing is straightforward once you know where to look, but the right accessories make the process faster and the results more permanent. Jackie's Attic offers practical home accessories, including rotatable faucet extenders that let you reposition your stream without a full fixture replacement. Browse the collection and find the fix that fits your setup.
This article was written using GrandRanker


