


Quick Summary
Clean stainless steel travel mugs once a day with warm soapy water and a soft bottle brush, then deep clean weekly. Take the lid, gasket and straw apart first so residue in those parts gets removed too.
- Wash daily with warm soapy water and a soft bottle brush.
- Remove the lid, gasket and straw and clean them separately.
- Soak coffee stains in two tablespoons of baking soda for 30 minutes.
- Use equal parts white vinegar and warm water for a 30-minute deep clean.
- Avoid steel wool, abrasive pads and bleach, which can scratch the interior.
Table of Contents
- How to Clean Stainless Steel Travel Mugs Inside and Out
- What You'll Need to Clean a Stainless Steel Travel Mug
- Step 1: Disassemble the Mug, Lid and Gasket
- Step 2: Clean the Interior With Soap, Baking Soda or Vinegar
- How to Remove Coffee Stains From a Stainless Steel Mug
- How to Clean a Travel Mug Lid and Gasket Thoroughly
- How to Get Coffee Smell Out of a Travel Mug
- Dishwasher Safety, Methods to Avoid and Routine Care
- Your Next Step: Keep Your Mug Clean Between Deep Cleans
- Frequently Asked Questions
How to Clean Stainless Steel Travel Mugs Inside and Out
Last Updated: October 30, 2026
What You'll Need to Clean a Stainless Steel Travel Mug
Clean stainless steel travel mugs once a day with warm soapy water, and do a deeper clean once a week. If you pack these mugs for trips, see durable USB-C cables for travel for what actually holds up. Most mugs need only a few basic supplies, and you probably already have them at home. The best cleaning routine is the one you will actually stick to, so keep it simple.
Here is what to gather before you start:
- Warm water and mild dish soap
- A soft bottle brush with a long handle, for reaching the inside walls
- A small detail brush or old toothbrush, for the lid, seal and straw
- Baking soda, for gentle scrubbing
- White vinegar, for loosening stains and odors
- A clean, dry towel, for drying every part
Watch out: Avoid steel wool, abrasive scouring pads and bleach. They can scratch the interior finish and leave it dull, which makes stains and odors cling more easily.
Step 1: Disassemble the Mug, Lid and Gasket
Take the mug apart before you clean it. Most travel mugs have a removable lid, a rubber gasket or seal, and sometimes a flip top or straw. Cleaning these parts separately is the only way to reach the spots where bacteria and smells build up.
- Unscrew or unlatch the lid from the mug body.
- Pull out the rubber gasket or seal. Gently work your fingers under the edge to lift it free.
- Remove the straw, flip top or any other small parts.
- Lay all the pieces on a clean towel so none of them get lost.
Some mugs have a seal that is glued in place. If yours does, skip removing it and clean around it carefully.
Step 2: Clean the Interior With Soap, Baking Soda or Vinegar
Start with warm soapy water for everyday dirt. For tougher buildup, add baking soda or vinegar. Work in this order so each step builds on the last.
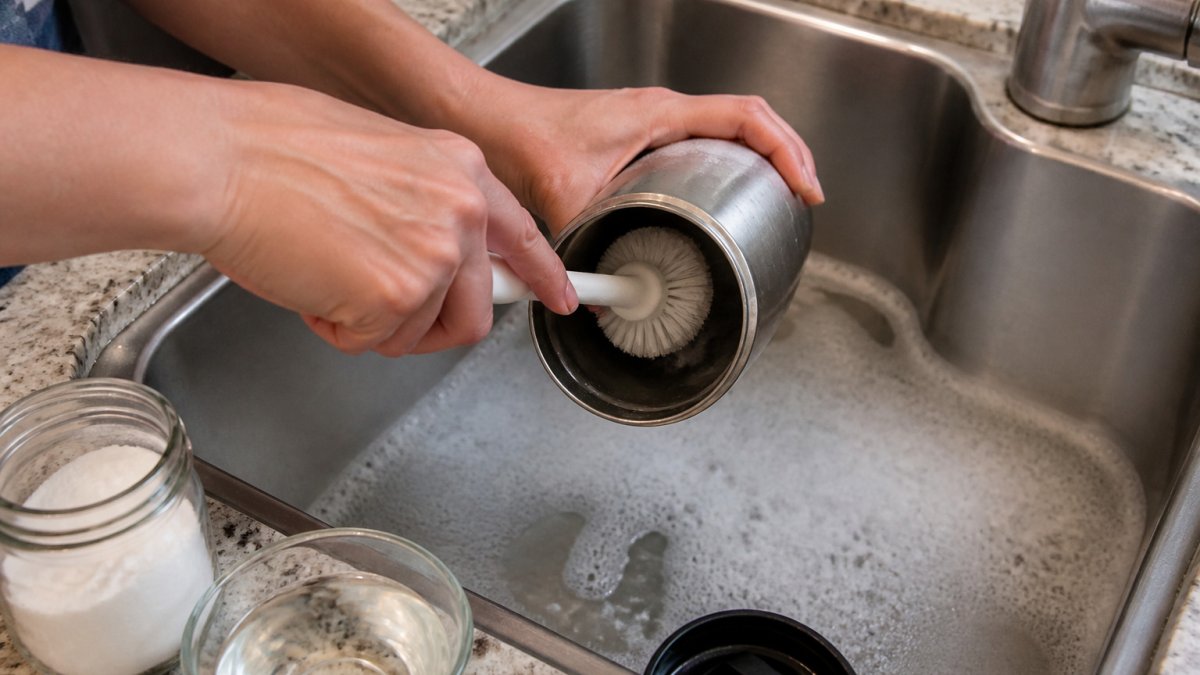
- Fill the mug about one-third full with warm water and add a few drops of dish soap.
- Put the lid on loosely and shake the mug for 10 seconds.
- Use the long bottle brush to scrub the inside walls and base.
- Rinse thoroughly with clean water.
- If stains or odor remain, sprinkle one tablespoon of baking soda inside, add a little water to make a paste, and scrub gently.
- For a deeper clean, fill the mug with equal parts white vinegar and warm water and let it sit for 30 minutes. Scrub again, then rinse well.
A common mistake is rushing the rinse. Leftover vinegar or soap can change the taste of your next drink, so rinse until the water runs clear.
How to Remove Coffee Stains From a Stainless Steel Mug
Coffee stains are usually brown rings near the top or along the base. They respond well to soaking.
Fill the mug with warm water and add two tablespoons of baking soda. Let it soak for 30 minutes, then scrub with the brush. For stubborn rings, use the vinegar soak from Step 2 overnight, then rinse and scrub again.
Tea stains work the same way. The vinegar soak is especially helpful for tannin buildup, which looks like a thin, yellowish film.
How to Clean a Travel Mug Lid and Gasket Thoroughly
The lid and gasket trap more residue than the mug body. Coffee oils, tea tannins, and milk proteins can collect in the drinking spout, under the flip-top hinge, and along the inner lip of the rubber seal.
Work through the lid in the right order
- Open every moving part. Flip the drinking cap open, slide the closure to its unlocked position, and pop off any removable cover. Residue hides in the closed position, so cleaning a latched lid leaves the dirtiest surfaces untouched.
- Remove the gasket. Work a fingernail or the tip of a plastic detail brush under the edge of the rubber seal and lift it free. Do not use a knife, a slip can nick the seal and create a leak path. If the seal is glued in place, skip removal and clean around it with the detail brush.
- Clean the spout and hinge. Run warm soapy water through the drinking spout from both directions. Use a small detail brush or an old toothbrush to scrub inside the spout, around the hinge pin, and into the air vent hole. A pipe cleaner works well for the vent on narrow-lid models.
- Scrub the gasket on both faces. Hold the gasket under running water and rub both sides with soap and your fingers. If it feels slick or smells sour after rinsing, sprinkle a little baking soda on it, scrub, and rinse again.
- Clean straws and straw lids separately. Run warm soapy water through the straw, then push a straw brush through it. Rinse from both ends until the water runs clear.
- Air-dry every part fully before reassembly. Set the lid, gasket, and straw on a drying rack with the openings facing down. Reassembling a damp gasket can trap moisture against the lid.
Reassembly check
Seat the gasket flat in its channel with no twists or pinches, then close the lid and test for leaks with a little water before your next drink.
How to Get Coffee Smell Out of a Travel Mug
A lingering coffee smell usually comes from oils that cling to the metal and the seal. Soap alone often does not remove them.
Try this method:
- Fill the mug with warm water and add two tablespoons of baking soda.
- Let it sit for an hour.
- Scrub the interior and the gasket, then rinse.
- If the smell stays, repeat with white vinegar instead of water.
Leave the lid off overnight to let the mug air out. This simple step often removes the last of the odor.
Dishwasher Safety, Methods to Avoid and Routine Care
What can go in the dishwasher
Many stainless steel travel mugs are dishwasher-safe, but the lid, gasket, and straw often are not. Check the manufacturer's care label before you put anything in the dishwasher.
If the care label is missing or unclear, hand-wash everything.
Methods to avoid
- Oven cleaner and harsh chemical sprays. These are far too aggressive for food-contact stainless and can leave residue that is difficult to rinse away completely.
- Bleach on gaskets or in the mug. Bleach attacks rubber and can pit lower-grade stainless; it is not needed for routine cleaning.
- Steel wool and abrasive scouring pads. They scratch the interior finish, and a scratched surface gives stains and odors more places to cling.
- Boiling water in a sealed mug. Trapped steam pressurizes the lid and can force the seal or spray hot liquid when opened.
- Leaving water sitting in the mug for days. Standing moisture is the leading cause of sour smells and surface discoloration.
Routine care schedule
- After every use: rinse with warm water and leave the lid off to dry.
- Daily: wash with warm soapy water and a soft bottle brush.
- Weekly: clean the lid, gasket, and straw with the detail brush; check the gasket for cracks or stickiness.
- Monthly: deep clean with baking soda or vinegar, and inspect the gasket for replacement.
Troubleshooting persistent problems
Different residues need different treatments, so match the method to the symptom:
- Sour or mildew smell: usually the gasket and lid, not the mug body. Remove the gasket, scrub both faces with baking soda, rinse, and air-dry fully before reassembly.
- Lingering coffee or tea odor in the body: soak with two tablespoons of baking soda in warm water for an hour, then rinse. If the smell persists, repeat with a 1:1 white vinegar and water soak.
- White chalky film (mineral deposits): a vinegar soak dissolves the scale. Fill with equal parts white vinegar and warm water, let sit 30 minutes, scrub, and rinse until the water runs clear.
- Brown or yellowish staining: baking soda paste for coffee rings, vinegar soak for tea tannins. Do not reach for abrasives, they scratch the finish and make future staining worse.
- Mug no longer holds heat: the vacuum seal has likely failed. No cleaning method restores it; replace the mug.
The article lays out a routine care schedule, so here it is at a glance.
| Frequency | Task | Notes |
|---|---|---|
| After every use | Rinse with warm water, lid off to dry | Prevents standing moisture |
| Daily | Wash with warm soapy water and soft bottle brush | Basic daily clean |
| Weekly | Clean lid, gasket and straw with detail brush | Check gasket for cracks or stickiness |
| Monthly | Deep clean with baking soda or vinegar | Inspect gasket for replacement |
Your Next Step: Keep Your Mug Clean Between Deep Cleans
A clean mug is a better mug. Rinse it after each use, keep the lid and gasket dry, and follow the monthly deep clean. If you're looking for practical tools that make daily routines easier, browse the accessories and gadgets at Jackie's Attic.
Frequently Asked Questions
How do I get coffee stains out of a stainless steel mug?
Fill the mug with warm water and add a tablespoon of baking soda or a splash of white vinegar, then let it soak for 15 to 30 minutes. Scrub the stained areas with a soft brush or sponge, rinse thoroughly and dry. For stubborn stains, repeat the soak or leave the solution overnight. Avoid abrasive scouring pads, which can leave fine scratches that make future stains harder to remove.
Can I use dish soap to clean a stainless steel travel mug?
Yes. A mild dish soap such as Dawn works well for routine cleaning of a stainless steel travel mug. Mix a few drops with warm water, scrub the interior and exterior, then rinse until no suds remain. Dish soap alone handles everyday coffee residue, while baking soda or vinegar helps with stains and odor. Always rinse completely so no soap taste carries into your next drink.
Can stainless steel travel mugs go in the dishwasher?
Many stainless steel travel mugs are dishwasher-safe, but check the manufacturer's care instructions first. If your mug is dishwasher-safe, remove the lid, gasket and any straw before loading, and place them on the top rack.
How do you clean the lid and gasket of a travel mug?
Take the lid apart completely, removing the gasket and any straw or spout insert. Wash each piece in warm soapy water with a small brush to reach crevices. Check the gasket for trapped residue or mold, and soak it in a vinegar and water solution if odor remains. Rinse every part and let them air dry fully before reassembling, since moisture trapped in the gasket is a common source of smell.


